Using Three.js and JigLibJS Together
For whatever reason, one of my projects at my current employer led me to a need for doing some 3D work in HTML5′s canvas element. After a few hack-ish, amateur attempts at repurposing what I’d done for Mega Hovertank Wars, I decided to use something with a community behind it and found three.js from Mr.doob, a man you may have heard of through his work on Arcade Fire’s HTML5 experiment “The Wilderness Downtown.” There are plenty of other options out there (including some that use WebGL rather than a pure canvas renderer), but I think after perusing its examples and reading Seb Lee-Delisle’s blog, I’d settled on three.js.
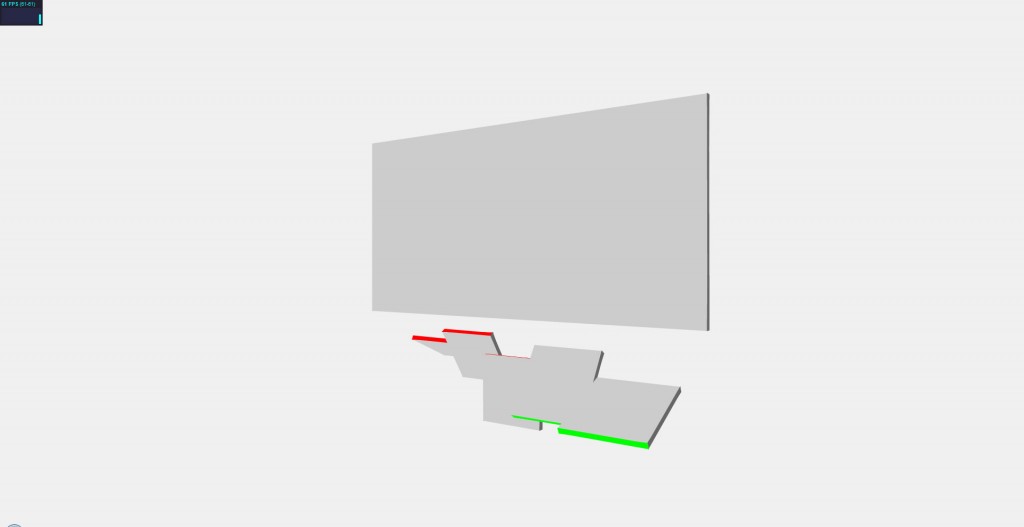
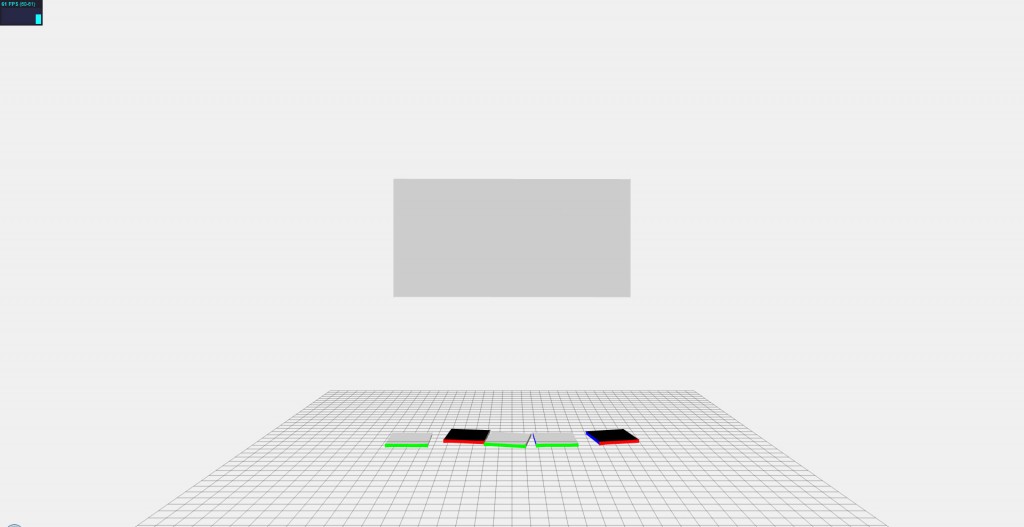
By modifying the geometry_cube.html example, I arrived at this:
All I did was change the face materials of the starting cube and used that materials array to color the 5 flaps below (along with changing some Camera() and Cube() dimension and position parameters, but those are pretty obvious):
1 2 3 4 5 6 7 8 9 10 11 12 13 14 15 16 17 18 19 20 21 22 23 24 25 26 27 28 29 30 31 | camera = new THREE.Camera( 45, window.innerWidth / window.innerHeight, 1, 3000 ); camera.position.y = 50; camera.position.z = 1500; camera.target.position.y = 50; scene = new THREE.Scene(); // Cube var materials = []; materials.push( [ new THREE.MeshBasicMaterial( { color: 0x0000ff } ) ] ); // Left side materials.push( [ new THREE.MeshBasicMaterial( { color: 0x666666 } ) ] ); // Right side materials.push( [ new THREE.MeshBasicMaterial( { color: 0xff0000 } ) ] ); // Top side materials.push( [ new THREE.MeshBasicMaterial( { color: 0x00ff00 } ) ] ); // Bottom side materials.push( [ new THREE.MeshBasicMaterial( { color: 0xcccccc } ) ] ); // Front side materials.push( [ new THREE.MeshBasicMaterial( { color: 0x000000 } ) ] ); // Back side cube = new THREE.Mesh( new Cube( 925, 460, 10, 1, 1, materials ), new THREE.MeshFaceMaterial() ); cube.position.y = 150; cube.overdraw = true; scene.addObject( cube ); // Flap for(var i = 0; i < offset.length; i++) { flap[i] = new THREE.Mesh( new Cube( 160, 160, 10, 1, 1, materials ), new THREE.MeshFaceMaterial() ); flap[i].autoUpdateMatrix = false; flap[i].overdraw = true; flap[i].position.y = flap[i].originalY = (i % 2 == 1 ? -210 : -250); flap[i].position.x = offset[i]; scene.addObject(flap[i]); } |
That was the simple part. The only true oddity is setting the autoUpdateMatrix attribute of each square to false. This is because if you don’t do this, you can’t manually modify each square’s matrix later on. Also, if you notice, when you drag around on the example, the cube spins, and I wanted to incorporate that into the “flaps” animations.
Relative Animation
Well, that’s what I’m calling it anyways. What it really means is that I based the “flapping” intensity on the difference between the main panel’s targetRotation and current rotation (cube.rotation.y).
The physics I was hoping to achieve was something that looked like there is a rope between the panel and the squares and they flail in the wind behind the panel as it rotates. Something like this:
It looks pretty good considering the code is based mostly on basic advanced math.
1 2 3 4 5 6 7 8 9 10 11 12 13 14 15 16 17 18 19 20 21 22 | var cval = Math.cos(cube.rotation.y); var sval = Math.sin(cube.rotation.y); var rot = (targetRotation - cube.rotation.y) * 0.6; var dir = new THREE.Vector3(cval, 0, -sval); for(var i = 0; i < flap.length; i++) { var nrot = rot * Math.abs(offset[i] / 382.5); if(nrot > PI2) nrot =PI2; else if(nrot < -PI2) nrot = -PI2; flap[i].position.x = offset[i] * cval; flap[i].position.z = -offset[i] * sval; if(offset[i] != 0) { flap[i].position.y = (flap[i].originalY + 80) - Math.abs(Math.cos(nrot) * 80); var rval = Math.sin(nrot) * flap[i].originalY;// flap[i].originalY for trailing, flap[i].height/2 (or 80) for hinge flap[i].position.x += rval * sval * -(offset[i] / Math.abs(offset[i])); flap[i].position.z += rval * cval * -(offset[i] / Math.abs(offset[i])); } alignCube(flap[i], dir.normalize(), (offset[i] < 0 ? 1 : -1) * nrot); } |
The first key is that in the lines where I’m setting each flap’s position.y, position.x and position.z values, that is to give the “roped” effect. All I’m really doing is adding to each position coordinate as if it were rotating on a hinge. Simple math!
The second key is that you are determining the vector pointing along the front face of the panel at any given point of the rotation by taking the Math.cos() and Math.sin() values of the current rotational value of the panel. This allows us to find the axis we need to rotate each square.
3D Rotation Along An Arbitrary Axis
However, doing this was harder than I thought it would be. After some quick Googling, however, I found an extremely helpful Stack Overflow post and simply adapted some of the help in the discussion for my own purposes:
1 2 3 4 5 6 7 8 9 10 11 12 13 14 | function alignCube(target, dir, rot) { var up = new THREE.Vector3(1, 0, 0); var angle = Math.acos(up.dot(dir)); var axis = new THREE.Vector3(); axis.cross(up, dir); axis.normalize(); var position = THREE.Matrix4.translationMatrix( target.position.x, target.position.y, target.position.z ); var rotate = THREE.Matrix4.rotationAxisAngleMatrix(axis, angle); var revolve = THREE.Matrix4.rotationAxisAngleMatrix(dir, rot); var scale = THREE.Matrix4.scaleMatrix( 1, 1, 1 ); revolve.multiplySelf(rotate); position.multiplySelf(revolve); target.matrix = position; } |
To simplify, you want to find the axis and angle that will get the original vector to match the desired vector, cross-multiply them, and normalize. That will allow you to form the rotation and revolution matrices which you can then multiply with the position matrix (the ordering of which is important, i.e. (revolve x rotate) x position) which results in the final position and orientation matrix.
Integrating JigLibJS Physics
Unfortunately, this wasn’t as realistic as I’d hoped. I could have done more tweaking to avoid some faults against true physics (such as when you abruptly change directions but only to stop rotation, the squares don’t swing back and forth in a natural fashion), but the end goal for this little side project was much more grand to the point where it just made more sense to use real physics.
Always interested by physics engines such as Havok, a popular choice for video game developers, I started to browse. I first arrived at a port of the Bullet Physics Library for JavaScript by Pl4n3, but it was incredibly buggy. Object would collide and bounce and almost always freeze. I love the effort, but bullet.js was a definite no-go.
Remembering a physics library called JigLib that was ported to Flash from Java, I hoped that someone had done the same for JavaScript, and luckily someone had! JigLibJS was functional, actively developed, and—most importantly—stable.
If you’re not aware (and I wasn’t prior to this little excursion, though in hindsight, it makes total sense), physics engines work by pretty much having you define objects from your rendered model world in the physics world. You then access the objects in the physics engine and take their position and orientations and apply them to the rendering engine, so this is what I did.
1 2 3 4 5 6 7 8 9 10 11 12 13 14 | var system = jigLib.PhysicsSystem.getInstance(); system.setGravity([0,-9.8,0,0]);//-120 system.setSolverType('ACCUMULATED');//FAST, NORMAL, ACCUMULATED var ground = new jigLib.JPlane(null,[0, 1, 0, 0]); ground.set_friction(10); system.addBody(ground); ground.moveTo([0,-650,0,0]); panel = new jigLib.JBox(null, 925, 10, 460); panel.set_mass(50); panel.moveTo([0, 150, 0, 0]); panel.set_movable(false); system.addBody(panel); |
JigLibJS is pretty intuitive. The first two lines are system-wide parameters in that everything works on a -9.8 units per second per second gravity and uses the accumulated solver type (it’s the most accurate but is also the slowest of the three).
JigLibJS automatically considers JPlane() objects to be immovable and can thus easily be added to be ground and wall boundaries in the physics system. Other items like boxes are defined and moved about in a manner similar to three.js, so that was handy. One key line for the panel variable is the set_movable(false) so that it isn’t not going to move about under gravity or as other JigLibJS objects collide with it.
I simply repeated that for each square that I wanted and voila, an accurate representation of my models in JigLibJS!
Putting three.js and JigLibJS Together
At this point it was really just taking one matrix (from JigLibJS) and setting the three.js matrix to it. The only weird thing is that I chose to orient the JigLibJS representation of the panel to the three.js representation while the squares went the other way around, i.e. from three.js to JigLibJS. This becomes clear later when I do the world constraints.
1 2 3 4 5 6 7 8 9 10 11 12 13 14 15 16 | cube.rotation.y += ( targetRotation - cube.rotation.y ) * 0.05; panel.set_rotationY( cube.rotation.y * (180/Math.PI) ); now = new Date().getTime(); system.integrate((now - then) / 75);//400 then = now; for(var i = 0; i < offset.length; i++) { var pos = obj[i].get_currentState().position; var dir = obj[i].get_currentState().get_orientation().glmatrix; var position = THREE.Matrix4.translationMatrix( pos[0], pos[1], pos[2] ); var rotate = new THREE.Matrix4(dir[0], dir[1], dir[2], dir[3], dir[4], dir[5], dir[6], dir[7], dir[8], dir[9], dir[10], dir[11], dir[12], dir[13], dir[14], dir[15]); position.multiplySelf(rotate); flap[i].matrix = position; flap[i].update(false, true, camera); } |
It’s very similar to the alignCube() function we had before, except the trouble of turning an axis and an angle into a matrix is done for us prior by JigLibJS. The result is some square falling from underneath the panel and laying there. Exciting, right?
But remember? I want them to hang like they’re on ropes, not fall straight to the ground!
JigLibJS Constraints
Luckily, JigLibJS has these things called constraints. The unfortunate thing is that they don’t work exactly as you would imagine. Whereas the JConstraintMaxDistance seems like it should work (or even the JConstraintPoint), they both have a slight…elasticity to their constraining action and it can’t really be avoided. I even tried out the spring simulation solution, but, surprise surprise, it behaved more like a spring than a rope.
Instead, I used JConstraintWorldPoint. It still has a slight stretch to the constraint distance, but it holds pretty well so long as you don’t spin the panel too fast.
1 2 | con[i] = new jigLib.JConstraintWorldPoint(obj[i], [0,80,0,0], [offset[i], (i % 2 == 1 ? -130 : -170), 0, 0]); system.addConstraint(con[i]); |
This little piece of code was simply added into the loop I had going for when I was creating each square in JigLibJS. It simply adds the constraint to the physics system.
However, since these constraints are simply bound to a point in the world (this is where using JConstraintMaxDistance would have been much simpler), you have to manually move each point that each square is bound to. Luckily, I’d previous solved this little puzzle back when I was doing relative animation.
1 2 3 4 5 | var cval = Math.cos(cube.rotation.y); var sval = Math.sin(cube.rotation.y); for(var i = 0; i < offset.length; i++) { con[i].set_worldPosition([offset[i]*cval, flap[i].originalY+80, -offset[i]*sval, 0]); } |
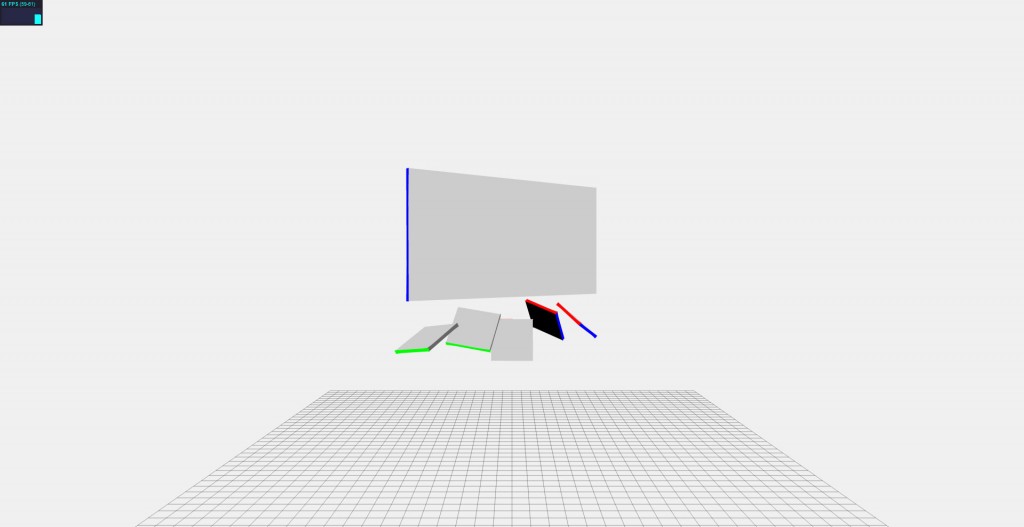
That takes place within the animation loop and simply iterates over each constraint and moves it according to the orientation of the three.js representation of the panel. If it all goes according to plan, it should look something like this when spun.
Yeah, it doesn’t look like they’re on ropes, but hey, it’s a lot closer than I was a few days ago.
View the demo (requires an HTML5-capable browser). You can use the up and down arrow keys to move the camera and click the squares to add and remove their respective JigLibJS constraints. The panel also auto-aligns every five seconds, so don’t freak out when things move without you doing anything.


Looks really interesting, in retrospect how well did it work and if you had to redo the project now, would you use the same js physics library?
Probably not. I mean, JigLibJS is pretty good and all, but now that I better understand how physics engines work with the rest of an application, I think I’d like to give it a try writing my own.
If I was left to choose a pre-made and ready-to-go library, though, I’d probably stick with JigLib. It’s one of the faster libraries and doesn’t suffer from stuttering objects as much as others.
[...] which in itself is a port of Jiglib for c++. It seemed pretty promising, since there was some people using it (along with three.js), and I had great success with using physics libs in the past for 2d [...]
[...] one stage I was considering the use of the JigLibJS library as discussed on Tim Poon’s site. Didn’t go down this road in the end but could be [...]
Thanx a lot! Very good report about an easy issue with the right tools! Merry x-mas and a Happy new year
Seeking the perfect electric massager? You’ve come to
the right place! At MassageSolutions, we bring you in-depth electric massager reviews to help you make the optimal choice.
Our reviewers thoroughly tests each electric massager to deliver impartial and informative reviews.
Whether you are suffering from muscle tension, chronic pain, or
simply need relaxation, we’ve got you covered.
Discover the top-rated electric massagers on the market, see how they
stack up, and pick the perfect one for your requirements.
You can also find purchase guides and tips on how to make
the most of your electric massager.
Say goodbye to stress and hello to relief with the top-notch electric massagers.
Explore our assessments today!
In search of the perfect electric massager? You’ve come to the right place!
At MassageSolutions, we bring you detailed electric massager reviews to help you make the right choice.
Our team of experts thoroughly tests each electric massager to offer honest and
insightful reviews. Whether you’re experiencing muscle tension, chronic pain, or simply want
relaxation, we’ve got you covered.
Discover the highest-rated electric massagers
on the market, contrast, and pick the perfect one for your
requirements. You can also find purchase guides and advice
for how to make the most of your electric massager.
Wave farewell to aches and hello to comfort with the
top-notch electric massagers. Explore our
evaluations today!
Looking for the perfect electric massager? You’ve come to the right place!
At MassageSolutions, we bring you comprehensive electric massager
reviews to help you make the right choice. https://botswanaweddings.com/question/handheld-massager-homedics-your-way-to-success/
Our dedicated professionals puts each electric massager to the test to deliver impartial and insightful reviews.
If you’re dealing with muscle tension, chronic pain, or simply want relaxation, we’ve got you
covered.
Discover the top-rated electric massagers on the market, compare,
and choose the one that suits your needs. You can also find purchase guides and guidance about how
to make the most of your electric massager.
Say goodbye to aches and welcome relief with the top-notch electric
massagers. Explore our assessments today!
Right away I am ready to do my breakfast, when having my breakfast coming over again to read other news.
Good respond in return of this query with solid arguments and explaining
all on the topic of that.
Making a single rose wrist corsage could also be very straightforward.
All you need is a wire hanger, a ribbon with space between every rose stalk,
and a few flower tape to safe it. Select the model of Boutonniere after which it is feasible for you to to decide on the rose shade,
orchid shade and tell us what colour ribbon you want to.
This DIY wrist corsage or boutonniere will assist make certain you
may have the right costume for your special night time.
Nevertheless, in recent years, some homecoming goers have begun shopping for their very own corsages.
The beauty of DIY spray roses corsages is that you may customise them
to swimsuit any style. This Denim Flower Corsage is exclusive because you
may make it from previous jeans. You cannot wear simply any previous prom gown. This is ideal
for ladies who want a unique design for prom outfits. This project is ideal should you love flowers however
do not have a lot time to fuss over them.
Different women’s sneakers offer significantly more space for the toes and
subsequently more air in summer time! Flexibility in summer time.
You possibly can either put on them as operating sneakers, but in addition as sporty sneakers
for everyday wear or for short hikes by means of the countryside, making
them an excellent all-rounder when out and about. This unisex mannequin from Lizard can also be
nice as a second or third shoe for touring, because the sandal can withstand
rather a lot, however still has a small pack size and low weight.
This unisex leather-based moccasin is a good shoe for smart events,
however not appropriate for every lady’s foot.
Sebastian also wears the shoe merely for walks in the town. The out of doors footwear
also look nice and sporty, so it’s also possible to wear them in summer time for on a daily
basis put on in the city. Many manufacturers supply barefoot boots for girls that are ideal for colder weather.
The barefoot feeling of the German manufacturer
is admittedly very good! Because of this of I was in search of a pair that didn’t appear to be a “health chaser”, however one that may get me via on a regular basis life in a
good AND chic means. I additionally advocate the following video.
Hikes to Hallig Südfall are also organized from Nordstrand; here you want to walk there
and again inside one tide; nevertheless, there can also be the
offer of a carriage experience. Particularly if
you have high calls for on waterproof barefoot footwear and want
to use them primarily on hikes and walks in nature, then you should not go for a cheap lifestyle
barefoot shoe. They’ve particular waterproof membranes corresponding to Gore-Tex and supplies that forestall water from penetrating in order
that your ft stay dry in wet and snowy circumstances.
We also experiment with particular materials, akin to
B. Giesswein’s hottest merino men’s shoes can be found in our online store as merino slip-on sneakers or
merino runners for males. Giesswein’s quality merino wool is shorn from merino
sheep and is characterized by its implausible properties.
Giesswein’s winter Wool Sneaker Excessive Prime for men are the right males’s winter shoes for snowy days!
The great Wool sneakers for men are available in quite a few colors, easy and putting, so
that they can be utilized as workplace footwear or informal
shoes. A novel advantage: Merino footwear can even be worn barefoot.
Then our merino sneakers are precisely the appropriate treatment, because
merino wool is a really particular, pure fiber!
Factor clearly utilized.!
Lastly, if you’re searching for some plus-sized lingerie sets that may turn up the heat, you’ve obtained to take a look at what Lingerie Diva has in retailer. Looking the web I occurred throughout a number of stunning bra and temporary units. Beneath are some plus sized lingerie sets Lingerie Diva has carried previously. Sadly, they’ve since offered out, but you possibly can click proper here to buy the entire plus measurement lingerie sets! If you store with Lingerie Diva, you can relaxation assured that we’ve curated just a few of the most well liked plus-sized pieces for the very best prices. Teddies or bodysuits are ultimate lingerie items because they are often worn so some ways. Even better, we like to help our Divas find the best pieces to flatter their shapes, so we are continually updating our weblog with useful lingerie procuring for suggestions and other enjoyable content material. And whereas Corsage doesn’t dramatize, or even mention, Sisi’s eventual assassination, it ends with an imagined leap of freedom, the happiest potential escape for an unhappy empress. You might even put on them exterior of the home if you type them right!
Aquarius Wellness Center For Healing Arts and Massage Therapy
7750 Clayton Rd Suite 103, St. Louis, MO 63117, United States
+1 314-645-7643
https://penzu.com/p/475f632755466de1
Amazing loads of superb tips!
Crash test dummies may be overweight, thin, tall or short.
The data crash assessments gather is so exact, it may help develop new and higher safety methods.
The U.S. government performs crash exams to guantee that vehicles
offered in the United States meet minimal security necessities.
Since nobody will drive his or her automobile on exactly
the same surfaces and at the identical speeds as the government test monitor, the
quantity isn’t an accurate indicator of how lengthy your tread will really final.
Illuminated brake lights indicate your automobile
is slowing down or has stopped, giving different automobiles – in daylight, dim light or darkness
- plenty of time to cease so they do not crash into you.
A helicopter prop mounted above the pilot’s head would provide
extended flight time. Maintain a relentless speed – Every time you velocity up the automotive, you employ energy, some of which is wasted whereas
you sluggish the automobile down again. Gibbs Technologies
has developed High Velocity Amphibian (HSA) technology that would remodel automobiles into amphibians.
At that point, severe industrial growth of jet pack expertise got here to a
halt. A U.S. development in nuclear weapon expertise during this
era was a number of independently targetable reentry autos (MIRVs) – single
missiles that could goal a number of cities with a number of nuclear warheads.
You have made your point pretty effectively.
My page – https://www.youtube.com/watch?v=pE8TH8hZ-48
Resulting from its great water depth, the large Brombachsee is usually
spared from the algae phenomenon. The water from the Igelbachsee flows
into the Großer Brombachsee, where the reservoir is at 410.5 m above sea stage.
Unlike the bigger lakes in the area comparable to Brombachsee and Altmühlsee,
it’s not used to transfer water that flows naturally from the Danube into the Regnitz and Principal river systems.
In addition to the lakes, you will see an authentic pure and cultural area
within the Franconian Lake District, making
the region perfect for hiking and cycling. The town gate, built within the 16th century, is one in all three
former gates alongside the Veiter Tor and the Nuremberg Gate.
The forerunner of the castle was Geyern Castle, whose construction dates back to the twelfth or
13th century based mostly on the form of the
complicated. The ability was renovated in 2015.
The city corridor and fairly a few shops are situated right here.
Around 1700 the place flourished once more: the Nepomuk Bridge was
inbuilt 1695, the town corridor 1702. For the reason that Reich Deputation Middle in 1803,
the place is like massive parts of Franconia (see
additionally history of Franconia). The banks of the Altmühlsee
line sandy beaches and wide lawn. The shepherd island is
an island near the south bank of the Altmühlsee within the Franconian Seenland, north of Unterwurmbach,
a municipal a part of the Middle Franconian city of Gunzenhausen.